Setup 2FA for CryptPad
In this tutorial we will see how to set up two-factor authentication (or 2FA) in CryptPad from an end-user point of view. To make a long story short you can look at the documentation for the concise explanation.
The main purpose of this tutorial is to accompany you through every step and to help you understand what is going on behind the scene.
Why does it matter?
Multi-factor authentication is a general term to describe authentication methods relying on the combination of multiple ways to confirm you identity. Ideally, these should live in different domains:
- Something I know: a knowledge that only the authenticating user is aware of, traditionally a password or a passphrase, but secret questions also fells into this category;
- Something I have: a form of data that the user can store, but doesn't have to remember. It is usually a cryptographic key that is stored in a device (an authentication device, your smartphone, a USB flash drive, and so on);
- Something I am: everything that is inherent to the identity of the user, such as biometry for instance.
The purpose of multi-factor authentication is to strengthen the usual username-password authentication method (which fells into the "something I know" category), so it does not act as a single-point of failure. With multi-factor authentication, even if your password leaks by any means, no one should be able to impersonate you based on this information alone. Similarly, biometric data inherent to users should not be used as a unique authentication factor as their secrecy cannot be guaranteed.
CryptPad 5.4.0 introduced 2FA using a time-based one-time-password (or TOTP) approach. The core idea is that upon initialization, a common secret is agreed on between CryptPad and the user. Then, the current time is used to agree on a common value based on these two pieces of information.
As a consequence, if you are managing your own CryptPad instance, you have to make sure that the date and time of your server remain fairly accurate (up to a 30 seconds shift), using NTP for instance.
Prerequisites
- A running CryptPad instance with version
>= 5.4.0; - A CryptPad account on this instance (or you can create one now)
- An external device that supports TOTP (for instance a smartphone with an authenticator application, like Aegis, that can be found on F-Droid or Google Play Store). It will later be referred as authentication device.
Step-by-step user guide to setup 2FA on Cryptpad
Now that we have everything we need, let us start. The first step is to
open your Security & Privacy settings:
User menu (top-right avatar to access) >
Settings > Security & Privacy
Then look for the “Two-Factor Authentication (2FA)” section:
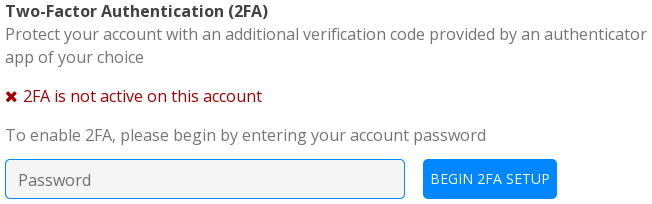
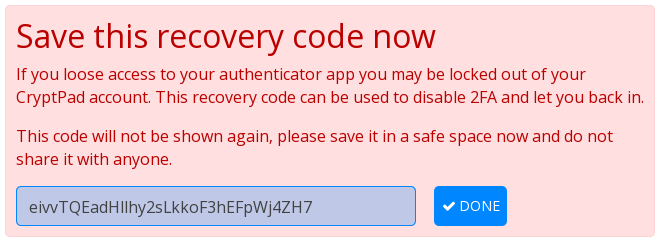
Now, you can enter your password to initiate the process. Once you validate, it should show an alert telling you to store a recovery code that will be useful to disable 2FA in case you don't have access to your authentication device anymore. Thus, you should store it in a safe place:
- recoverable even if you lose your authentication device;
- accessible even if you don't have access to your CryptPad account;
- separated from your password;
- not easily accessible for a third party.
These make your mobile phone or a “Recovery Code” file in your CryptDrive a bad idea. However, you can use an encrypted USB flash drive or a digital safe box/vault for instance.
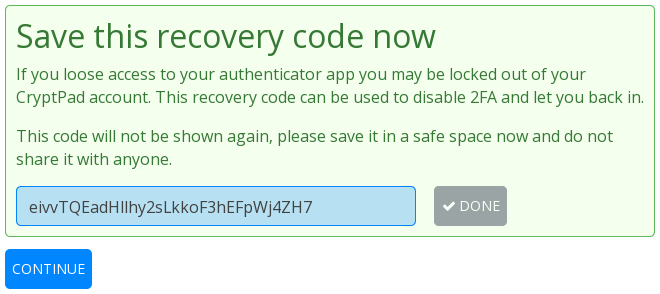
Once you stored this recovery code in a safe place, you can click on the “ Done” button, then “Continue”.
Then, it should show you a QR code that contains the common secret between CryptPad and yourself.
Warning. This is sensitive information, make sure that no one is spying on your screen at this point of time.
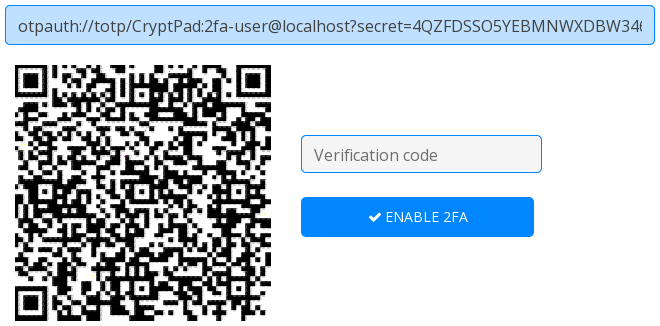
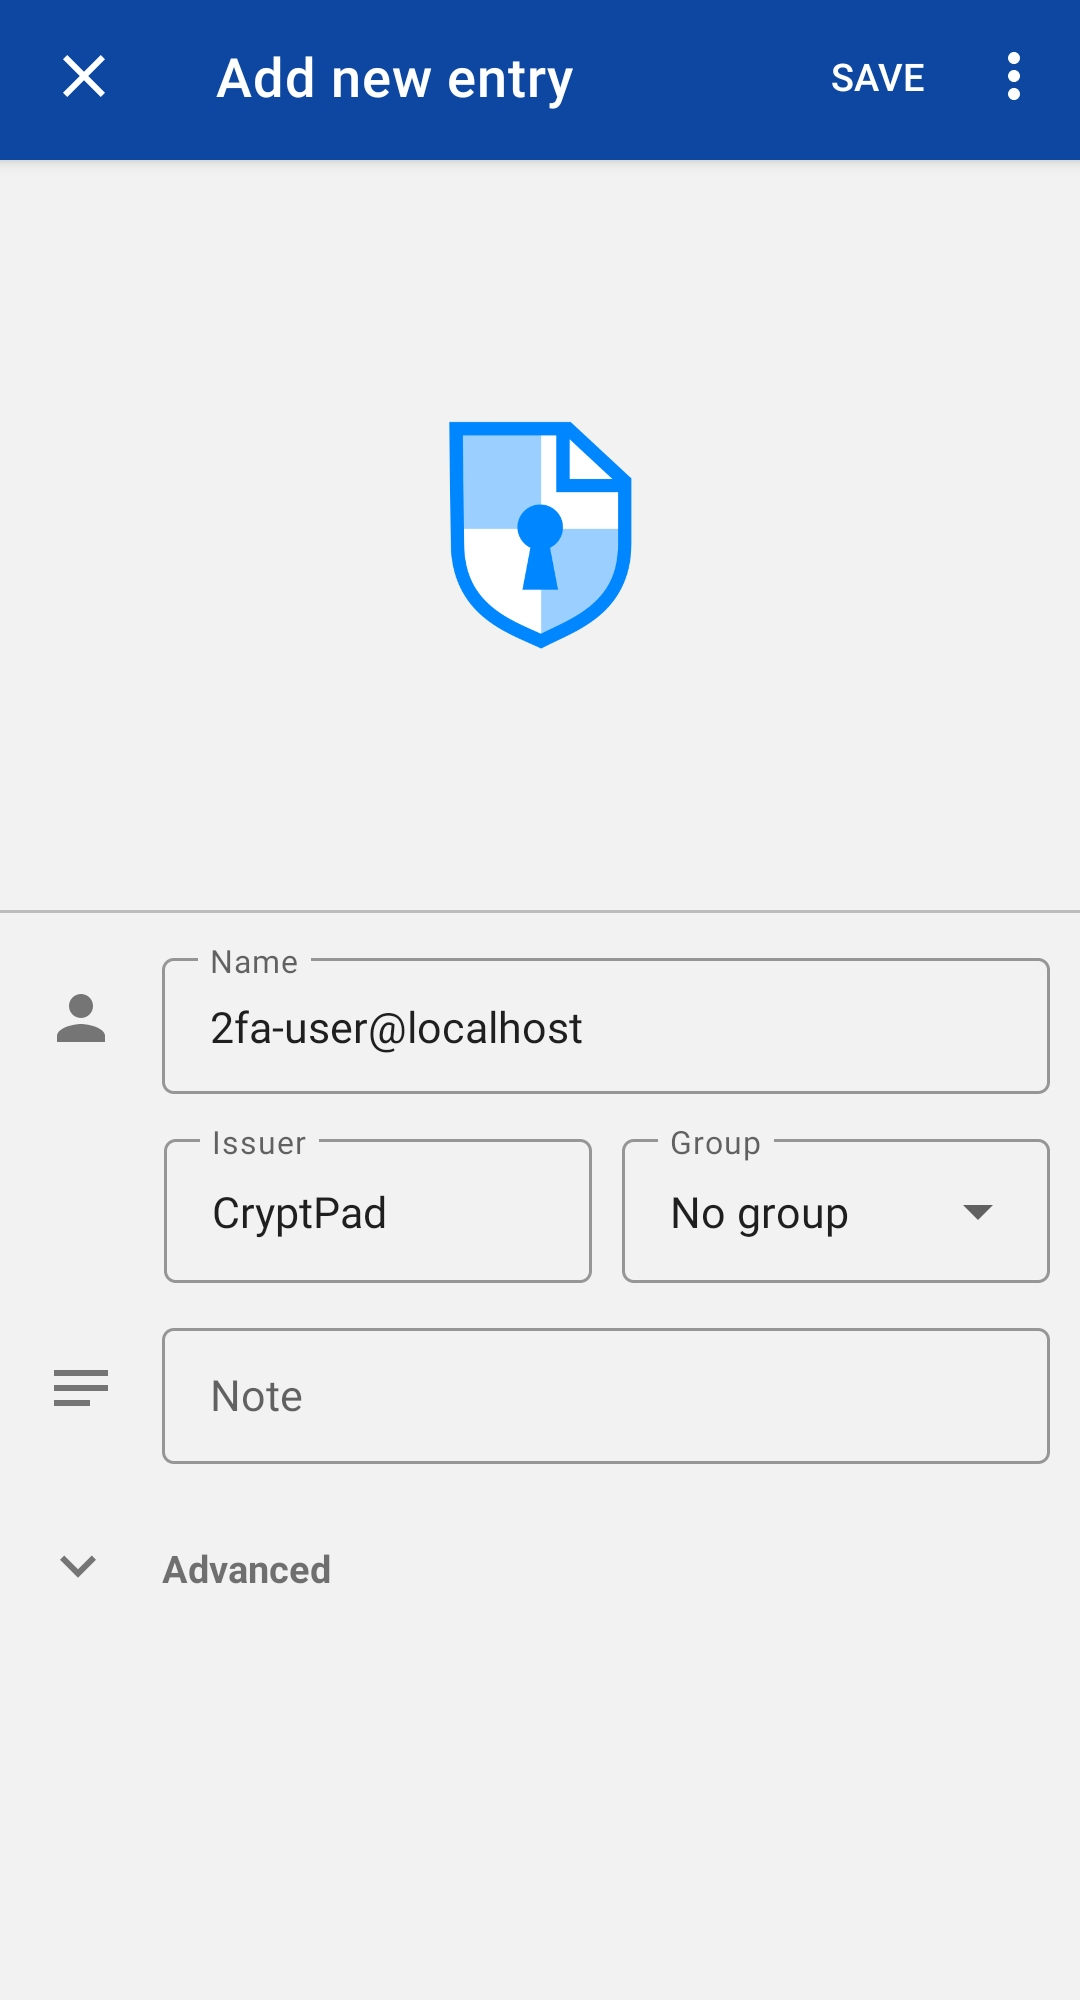
You can now scan the QR code with your authentication device, for instance Aegis on android would open the form shown hereunder upon scanning the QR Code, allowing you to customize the entry in the application. It could prove useful if you have many CryptPad accounts for instance to distinguish them in a glance.
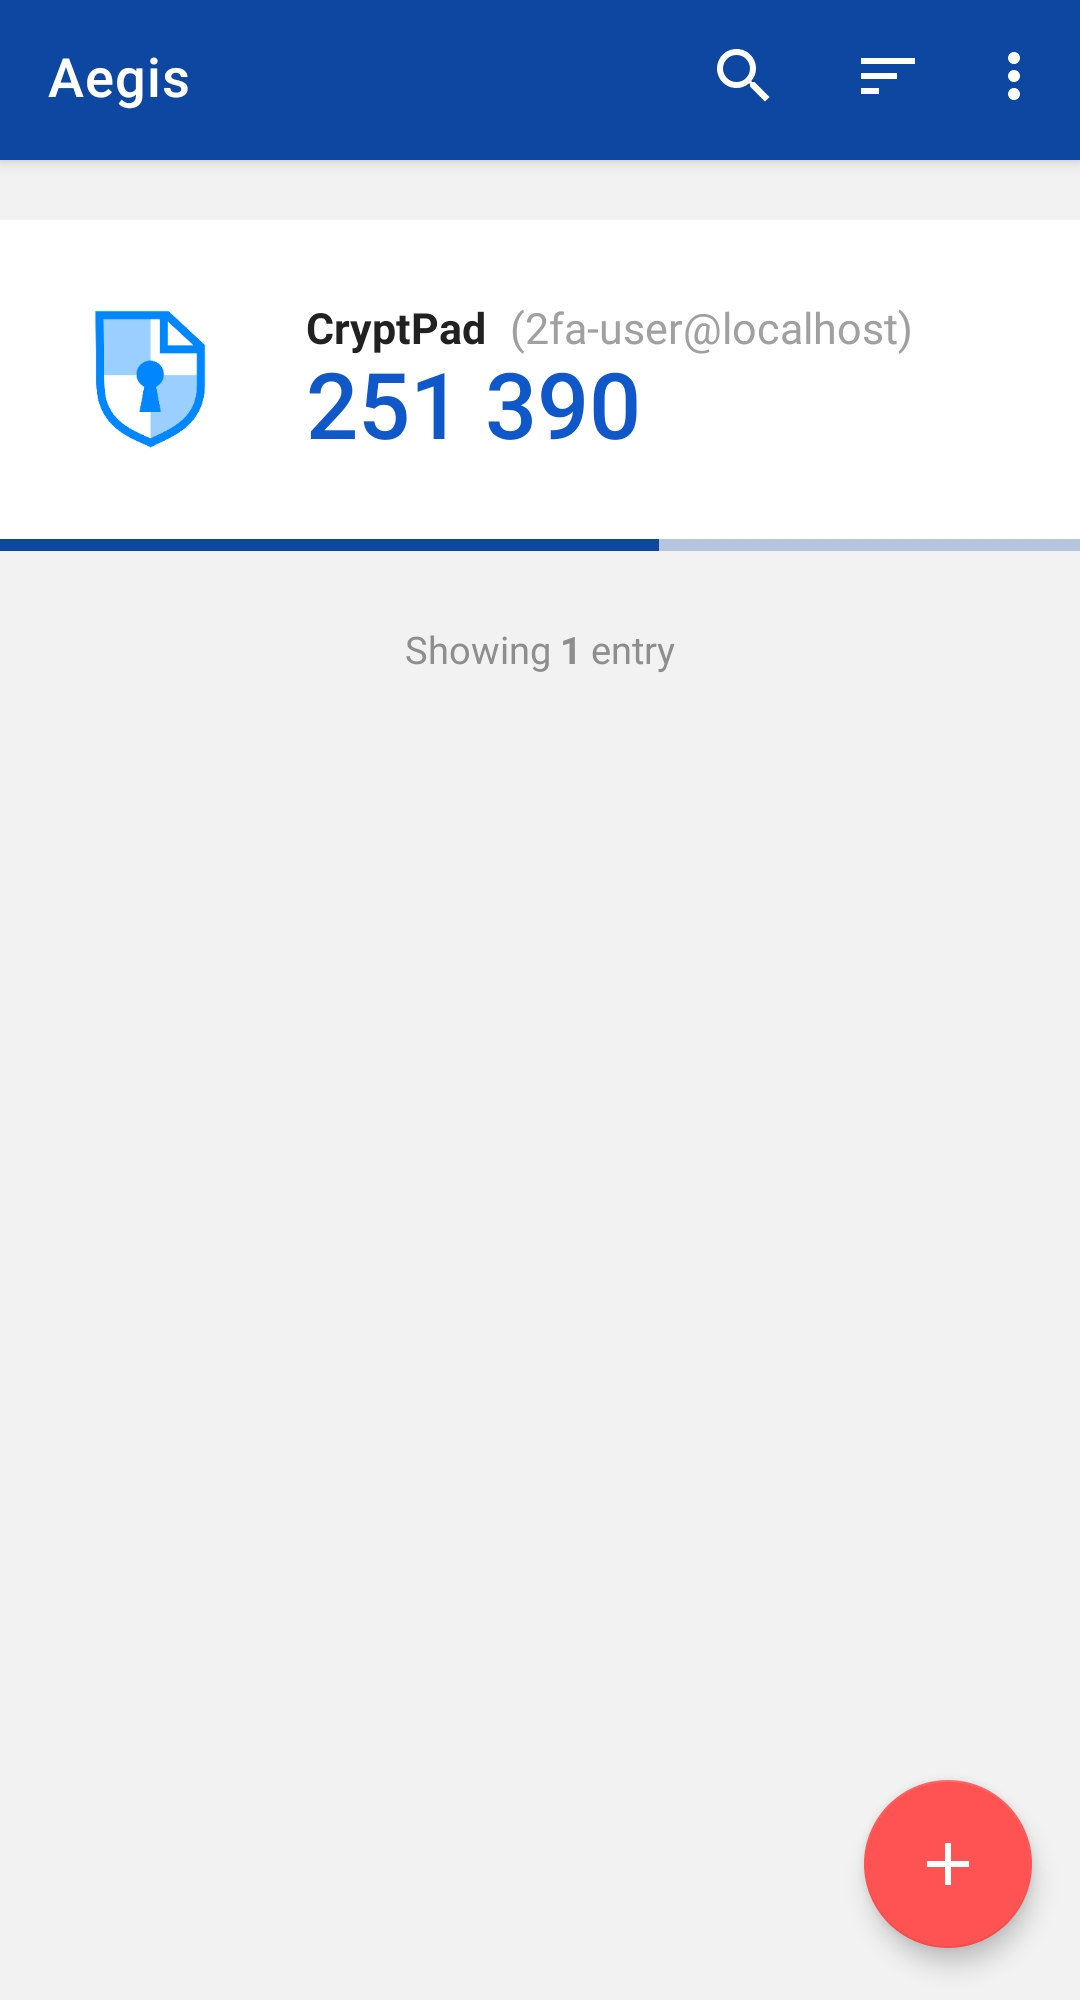
Once validated, your CryptPad 2FA verification token would appear as an item in a list in the application, with a progress bar telling you how long the shown verification code remains valid.
Now, it leaves you to enter this verification code in the CryptPad webpage and validate with the “ ENABLE 2FA” button.
One this is done, you should see the following text:

Congratulations! Your account is now set up to use 2FA using with TOTP.
Note that you will be disconnected for all your other sessions once it's done, you have to log in again in these sessions with your verification code.
This is done as usual, with the difference that after typing your login and password, a validation code from your authentication device will be requested.
More information
Disabling 2FA
When disabling 2FA, you need a final verification code, so don't remove it from your authentication device before removing it from CryptPad. Otherwise, you would need to retrieve your recovery code from its safe space. Or in a last resort, see the “I lost my recovery code!” section below to see how to use human intervention by contacting your instance administrators.
What is this text box above the QR Code?
Upon generating the shared secret between you and the server, that is given to you in the form of a QR Code, you can also notice that there is a text box above the QR code that contains a uniform resource identifier (URI for short). This otpauth URI represents the secret in a plaintext manner and allows to easily import it into applications that don't rely on a QR code scanner, for instance a password manager.
As we said previously, it is not recommended to store your password and your 2FA secret in the same place, as it makes your password manager a single-point of failure.
I lost my recovery code!
User guide
Good thing you use an encrypted flash drive to store your recovery code, however its data got corrupted on the way. What to do now?
Stay calm, it is possible for an administrator to disable 2FA for you provided that you send the relevant information.
For that when logging in, after typing your username and password, there is a link under the verification code prompt:

You can then click on the “Recover your account” link, that will ask your username and password again. Once that done, you end up in the page asking for your recovery code, however there is also a section to unfold “ Forgot recovery code” which shows a data-block that you can give to an instance administrator so that they can disable 2FA for your account.
Now, you can contact your instance administrator, politely explaining the situation and attaching this data block, and patiently wait for their answer.
Administrator guide
As an instance administrator, upon receiving a request to disable 2FA and verifying the identity of the requesting party, you have to go to the database section of the administration panel: User menu > Administration > Database
There you can go to the 2FA Recovery section and paste the data-block that the forgetful user sent you:
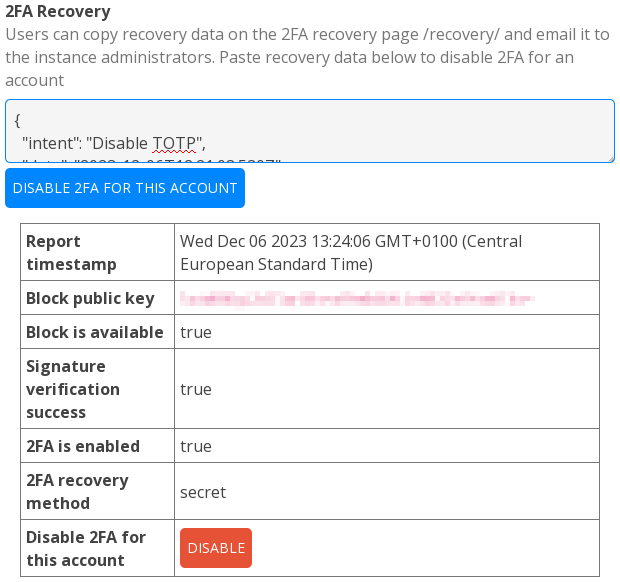
Then you just have to hit the “DISABLE” button and the “Are you sure?” confirmation to validate the user's query.
Good practices
Activating and using 2FA in itself doesn't guarantee that your account would remain safe whatever what happens, it is just another safety net.
However, to ensure that it works as intended, there are some mistakes to avoid. For instance, some password managers can act as a storage for your 2FA secrets and even generate the verification codes for you. In the event that your password is also stored there, then you create a new single-point of failure in your password manager. For the sake of honesty, we should mention that is it still way better than not having any 2FA at all (as it adds a temporal factor in what your password manager outputs in case of phishing attacks for instance). It should be avoided in an ideal world, but we are not living in this world.
In general, you should avoid at all cost storing your passwords, secret keys and
recovery keys in a place where it is easily accessible (for instance in a
my_passwords.csv file in the clear on your drive, or in a plaintext cloud
storage).
The use of a password manager makes it easier for users to manage this part as
long as one sets up the appropriate measures to keep it secure, for instance
with the use of a strong primary password, or not leaving your computer
unattended in an unlocked
state.
See also
For further information about multi-factor authentication and password management, you can see:
- Wikipedia. Multi-Factor Authentication.
- NIST blog. Back to Basics: What’s multi-factor authentication - and why should I care?
- NIST Topics. Multi-factor authentication.
- NIST. NIST Update: Multi-Factor Authentication and SP 800-63 Digital Identity Guidelines.
- 🇫🇷 ANSSI. Recommendations about multi-factor authentication and passwords. October 2021.
Links